Gluten Free Canadian Butter Tart: An Elegant Twist on Sweet Tradition
I’ve been feeling like I’ve neglected my duty as a Canadian gluten free food blogger by not giving you a gluten free butter tart recipe. Of course, there are lots of them out there so I created this gluten free Canadian butter tart so you could have something a little bit special and a little bit fancy for a holiday meal or special occasion.

It has all the sweet buttery goodness of the traditional Canadian butter tart, with a soft flaky almond crust and crunchy pecans. It’s kind of like a butter tart and a pecan pie got married and this is their beautiful child.
 |
Want simple guidance, trusted resources, and doable recipes delivered to your inbox once a week? |
|
Ingredients and Options
Gluten Free Almond Crust
I must give credit
where credit is due. I borrowed this
crust from the King Arthur site when they used it for lemon squares. You could of course make butter tart squares,
but I fell in love with this round presentation. It’s easier to get out of the pan, and I
think it’s prettier.
Start with cold ingredients. Especially the butter. I recommend mixing the ingredients then form the dough into a ball and stick it in the fridge. This will make it a little easier to work with when you go to spread it in the pan. If you’re pressed for time and want to skip this step it will be fine.
Salted or Unsalted Butter?
Conventional wisdom will tell you to use unsalted butter. If you feel strongly about this, go ahead. My grandmother always baked with salted butter, and I think it tastes much better. If you do this, then leave out the added salt.
Pin for Later

Gluten and Dairy Free Canadian Butter Tart
If you have problems with dairy like lactose or casein intolerance, or you’re just looking for a vegan version of this gluten free Canadian butter tart recipe that’s easy. Switch out the butter for a vegan butter substitute like Crisco Golden Shortening. Don’t use vegan margarine in a tub. It will be too soft and too likely to melt. For a truly vegan version you’ll also need to replace the eggs with a commercial egg replacer. I like Bob’s Red Mill.
Sweet Butter Filling
The filling is inspired
by my grandmother’s recipe out of her Purity cookbook, the 1945 edition. You can practically taste the tradition. Soft sweet brown sugar balances with rich creamy
butter and just enough lemon juice for a little snap so it’s not too cloying. Vanilla for flavor and then a couple of eggs hold
it all together. Couldn’t be simpler!
My favorite thing about this classic gluten free Canadian butter tart filling is no syrup! Many recipes call for corn syrup which gives you a runny consistency and a much less rich flavor. Some call for maple syrup. Okay, this does give you a classic Canadian maple flavor but in my opinion it’s not worth the sacrifice in texture.
What Pans to Use and How to Prepare Them
For this tart I used my mom’s 8 inch round layer cake pans. The recipe made two 8” round tarts. If you want to try butter tart squares this recipe will work perfectly. In this case use your 9 x 13 rectangular pan or two 8x8's. You could even make actual butter tarts in tart tins. If someone wants to try mini tarts, I’d love to hear how they turn out.
Why am I calling these butter tarts instead of a gluten free pecan pie recipe? Good question. You could call it a pecan pie if you like and I guess you wouldn’t be wrong, but because I use the almond crust and the steep sided layer cake pans, it just feels more like a tart to me. Po-tay-toe / Po-taw-toe.

To prepare your pans, grease them with a little butter or line them with parchment. I like parchment because it makes the pans easier to clean, especially when you’re working with sugar. Confused about how to line a round pan with parchment? That’s easy. Remember making paper snowflakes in school? Cut a rectangular piece of parchment the width of your pan. Fold it in half, then in half again the other way. From the corner where the folds meet, fold one side toward the other so you have a point. Do this again. Now hold the point at the center of the pan and measure to the edge. That’s where you cut the paper.
Baking Your Gluten Free Pecan Butter Tart
Preheat your oven to 325°F. DON’T prebake your crust. Simply press it into your two round pans, pour half the filling in each and get it right into the oven. I like to place the pans onto a baking sheet in case they overflow. It’s unlikely, but anything that will prevent me from having to clean burnt sugar out of my oven is a step worth taking. Bake for 30 – 35 minutes. It’s done when the center has started to bubble just a little.
Decorating and Serving

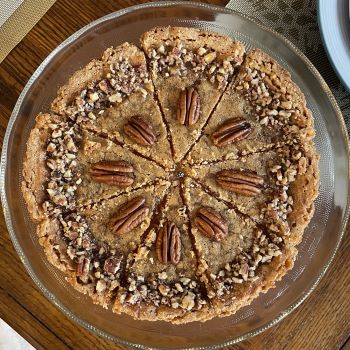
Here’s where you can get creative. The tart in the picture is decorated with a pecan half for each slice and crushed pecans around the edges. About 1/3 of a cup crushed for each of your 2 tarts should do the trick. Add the nuts while the tart is still warm so they’ll stick, then let it cool completely before serving so the crust will hold together.
The Recipe

Gluten Free Canadian Butter Tart: An Elegant Twist on a Sweet Tradition
By Patty Maguire – Naturally Gluten Free
I’ve been feeling like I’ve neglected my duty as a Canadian gluten free food blogger by not giving you a gluten free butter tart recipe. Of course, there are lots of them out there so I created this gluten free Canadian butter tart so you could have something a little bit special and a little bit fancy for a holiday meal or special occasion.
Prep Time: 20 minutes
Cook time: 30 mintues
Yield: 2 x 8" tarts or 16 servings
Tags: Gluten Free, Vegan Option
Ingredients
For the Base
- 2 cups of almond flour or almond meal
- 6 tablespoons of granulated sugar
- 3 tablespoons of corn starch
- ¼ teaspoon of salt (leave out if you’re using salted butter)
- 6 tablespoons of cold butter, diced
- 2 eggs
- 2 cups of brown sugar
- 2 tablespoons of lemon juice
- 1 teaspoon of vanilla extract
- ½ cup of butter, melted
- 2/3 of a cup of crushed pecans
- 16 pecan halves
For the Filling
For Decorating
Instructions
- Preheat your oven to 325°F.
- Prepare your pans. Grease the bottom and sides with a little butter, or line them with parchment.
- Make the base first by combining all the dry ingredients then add the butter. Incorporate the butter into the dry mixture with your fingers or a pastry blender until it’s evenly combined and will hold together into a ball.
- Wrap the ball of dough in plastic wrap and put it in the refrigerator while you make the filling.
- For the filling, beat the eggs lightly, until the whites and yolks are combined. Beat in the sugar then add the vanilla and lemon juice. Then add the melted butter. A stand mixer works well for this.
- Remove the dough from the fridge, divide it in half and press it into the bottom of the pans and up the sides about ½ inch.
- Pour half the filling into each crust then place on a baking sheet and into the oven.
- Bake for 30 to 35 minutes. The crust should be golden brown and the filling should be starting to bubble in the middle.
- Remove from the oven and let cool slightly, then decorate.
- Let your tarts cool completely before you try to slice them and remove them from the pan.
|
|
Want simple guidance, trusted resources, and doable recipes delivered to your inbox once a week? |
|

Patty Maguire is a George Brown College culinary graduate whose training focused on nutrition and cooking for special diets.
Since her celiac diagnosis in 2012, she has shared a practical, whole-food approach to naturally gluten-free living that helps readers cook with confidence, eat out safely, travel well, and live fully.
Rooted in farm-family values and simple home cooking, her work has been recognised by Feedspot’s top 10 Canadian gluten-free blogs list.
You might like these
Today's the Day | Sweet and Ridiculously Easy Gluten Free Banana Bread
Today’s the day. You are going to make gluten free banana bread. Why? Because this recipe is so ridiculously easy, there is no reason not to.
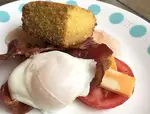
Perfect Poached Eggs
Protein is an essential part of a gluten free breakfast and these perfect poached eggs can be the quick easy centerpiece
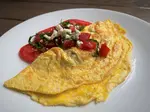
Make the Best Gluten Free Omelet Bursting with Tasty Fillings
In this guide I’ll walk you through the steps to craft a beautiful, silky smooth, light and fluffy omelet and provide tips to elevate your omelet game.


Hi, I'm Patty.
I'm a person with celiac disease, a culinary school grad, and a lifelong student of food and natural healing.
After my diagnosis in 2012, I enrolled in the Chef’s School at George Brown College and earned my Culinary Skills diploma, focusing on nutrition and cooking for special diets.
Cooking has changed my life — and helped me take back my health. Now, I’m here to help you do the same.
Let’s do this together!

Subscribe!
Get Naturally Gluten-Free Digest
Practical gluten-free tips + a featured recipe/article
delivered to your inbox.
Recent Articles
-
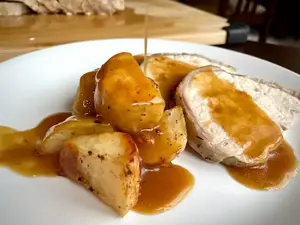
How to Make Gluten-Free Gravy That’s Rich, Smooth, and Satisfying
May 20, 26 01:09 PM
 Learn how to make gluten-free gravy that is rich, smooth, and full of flavor. Foolproof recipe with or without drippings, plus cornstarch and make-ahead tips.
 -
How to Make a Pan Sauce (Easy Restaurant-Quality Sauce in 5 Minutes)
May 13, 26 04:46 PM
Learn how to make pan sauce in 5 minutes and turn the browned bits in your skillet into a gluten-free sauce that makes chicken, steak, or pork taste special. -
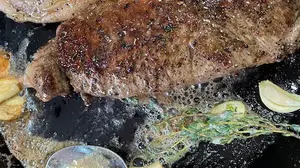
How to Pan Fry a Steak (Pan-Seared Method for a Perfect Crust)
May 02, 26 09:07 PM
 How to pan fry a steak perfectly on the stove. Get a golden crust and juicy center with this simple step-by-step method, timing guide, and expert tips.
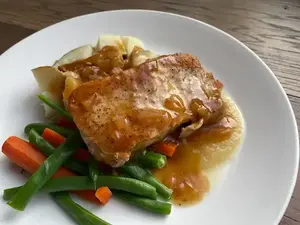
Popular Articles


Trained in Culinary Skills with a focus on Nutrition and Healthy Eating!
